
Food Photography for Restaurants: Capturing Menu-Worthy Images That Boost Bookings
- Adam's Apple
- Apr 5
- 5 min read

You can transform your menu and social feeds with food photography that makes customers pick up the phone or walk in the door. Use lighting, composition and honest styling to present dishes that look as good in the image as they taste in reality. Adams apple Media specializes in food photography that elevates your restaurant’s visual presence and entices new guests.
You will learn practical approaches that work in a busy kitchen: quick setup techniques, simple props and angles that reveal texture, and how to direct staff or a photographer to capture consistent shots that fit your brand. Clear, repeatable methods save time and reduce waste while improving the visual appeal of every dish. Adams apple Media’s food photography team can help you implement these strategies seamlessly.
Key Takeaways
Use natural light, clean composition and consistent styling to make food look appetising.
Adopt quick, repeatable setups to shoot efficiently during service.
Produce images that match your brand and drive bookings and orders.
Core Principles of Food Photography for Restaurants
Prioritise controlled light, deliberate styling and camera settings that reproduce texture, colour and portion size accurately. These elements directly affect how diners perceive taste, quality and value. Adams apple Media recommends food photography practices that highlight the best features of your cuisine.
Lighting Essentials for Food Images
Use natural side or backlight when possible; position the dish near a large window with diffused light to reveal texture and create gentle highlights. Avoid overhead fluorescent light that flattens food and shifts colour; introduce a white reflector opposite the window to fill harsh shadows without eliminating depth.
Control colour temperature: set your white balance to match the light source (e.g., 5200K for daylight) or shoot RAW so you can correct in post. Use a small LED panel (with adjustable Kelvin) for consistency on repeat shoots and flag the light with a black card to prevent spill onto backgrounds.
Keep a three-light mindset: key (main), fill (softens shadows), rim (separates subject from background). For small plates, use low-power strobes or speedlights on softboxes to freeze steam and fine details. Always test on the final plate and check skin tones on human subjects if staff appear in the shot.
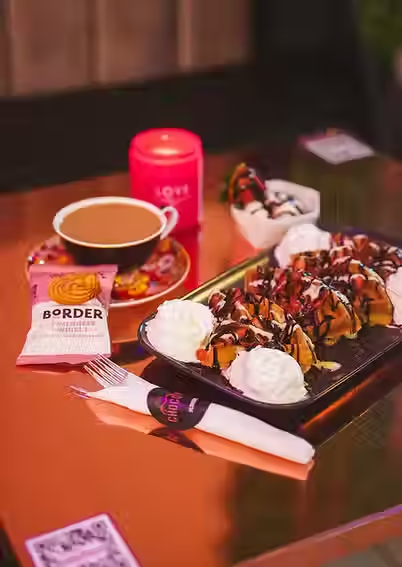
Styling Techniques for Restaurant Plates
Start by tasting and trimming: remove excess sauce pools and use tweezers to place microgreens or herbs precisely. Use a palette knife to create intentional sauce strokes and a small brush for clean rim edges. Present a single focal point per frame—such as the protein or signature garnish—to avoid visual clutter.
Choose props that support scale and story: use cutlery with similar weight to your cuisine, neutral napkins and textured boards that contrast the dish. Keep plate colour simple; white, matte grey or earth tones work well to maintain colour accuracy. If stacking, secure components with a tiny dab of sauce or a toothpick hidden beneath garnish to preserve structure during transport.
Pay attention to portion size and reheating: shoot the exact plate guests receive, not an augmented version. Photograph multiple variants—single portion, sharing platter and close-up detail—to meet menu and social media needs. Document garnish placement for reproducibility by front-of-house staff.

Camera Settings for Professional Results
Set aperture between f/4 and f/8 for close-ups to balance subject sharpness and background separation. For full-table shots, use f/5.6–f/11 to keep multiple items in focus. Use a focal length of 35–85mm on full-frame (or equivalent) to avoid perspective distortion; 50mm often gives a natural look for single plates.
Keep ISO as low as practical (ISO 100–400) to prevent noise; raise shutter speed above 1/125s for handheld close-ups or use a tripod and mirror-lockup for critical focus. Use single-point autofocus on the most detailed element, or switch to manual focus for macro compositions. Shoot RAW and enable highlight warning to protect specular highlights on glossy sauces.
Calibrate your monitor and use a colour checker during shoots when matching menu photos to printed materials. Record your settings and replicate them for each dish to ensure consistent results across days and outlets.
Creating Impactful Visuals and Menu Content
Food photography is essential for showcasing your most sellable dishes and refining images for consistency and appetite appeal. Adams apple Media understands how to place food photography in menus and online listings to drive orders and bookings.
Photographing Signature Dishes
Highlight the dish that defines your brand and photograph it repeatedly until you get a reliable setup. Use a low-angle (20–30°) for stacked items like burgers and cakes, and a top-down (90°) for flat compositions such as salads and bowls.Control lighting with a single soft key light at 45° and a white reflector opposite to lift shadows; avoid mixed colour temperatures from overhead fluorescents. Pay strict attention to plating: keep sauces neat, wipe rim smudges, and add one or two fresh garnishes only. Use a tripod, aperture f/4–f/8 for depth balance, and shutter speed that prevents blur; increase ISO only when needed to retain colour accuracy.Shoot tethered to a laptop to check focus and colour on a larger screen. Capture detail shots (close-ups at 50–100mm), contextual shots (table setting, hands serving) and an angled hero shot for each signature dish. Adams apple Media’s food photography service ensures your signature dishes stand out.

Editing and Post-Processing Strategies
Standardise edits to keep dishes recognisable and consistent across your brand. Create a base Lightroom/Photoshop preset: white-balance food to neutral (use a calibration card), set exposure and contrast to match the dish’s real appearance, then tweak vibrance and clarity modestly.Correct perspective and crop for the platform: square for Instagram, wider for website banners, and tight crops for mobile menus. Remove distracting elements with spot-healing but avoid over-smoothing textures that make food look artificial.Export images with sRGB colour profile; use high-quality JPEGs at 70–85% for web to balance file size and detail. Keep a master TIFF or RAW archive for future retouching or print.Log edit settings and filenames in a simple spreadsheet so you can reproduce exact looks for seasonal relaunches or franchise locations.
For expert food photography that consistently attracts diners and elevates your restaurant’s brand, Adams apple Media provides tailored solutions designed for the hospitality industry. Let Adams apple Media help you make every dish look irresistible through the power of professional food photography.
For more inspiration, check out our guides on Food photography ideas and How Food Photography Impacts Your Marketing Campaigns to refine your visual strategy.
Using Images to Enhance Online Menus
Place a single, high-quality food photography image for each key menu item to increase selection confidence; avoid crowding menus with too many images. Adams apple Media recommends 600–1200 px width for menu images on desktop and delivering 2x density (retina) versions for mobile clarity. Match food photography style to menu copy: show portion size accurately and include plating variations (add-ons, sides) when relevant. Use microcopy beneath food photography images—one line—stating allergens, portion weight, or cooking method to reduce order queries.Adams apple Media suggests prioritising fast-loading formats (WebP where supported) and lazy-load images below the fold to preserve page speed and SEO.


Comments